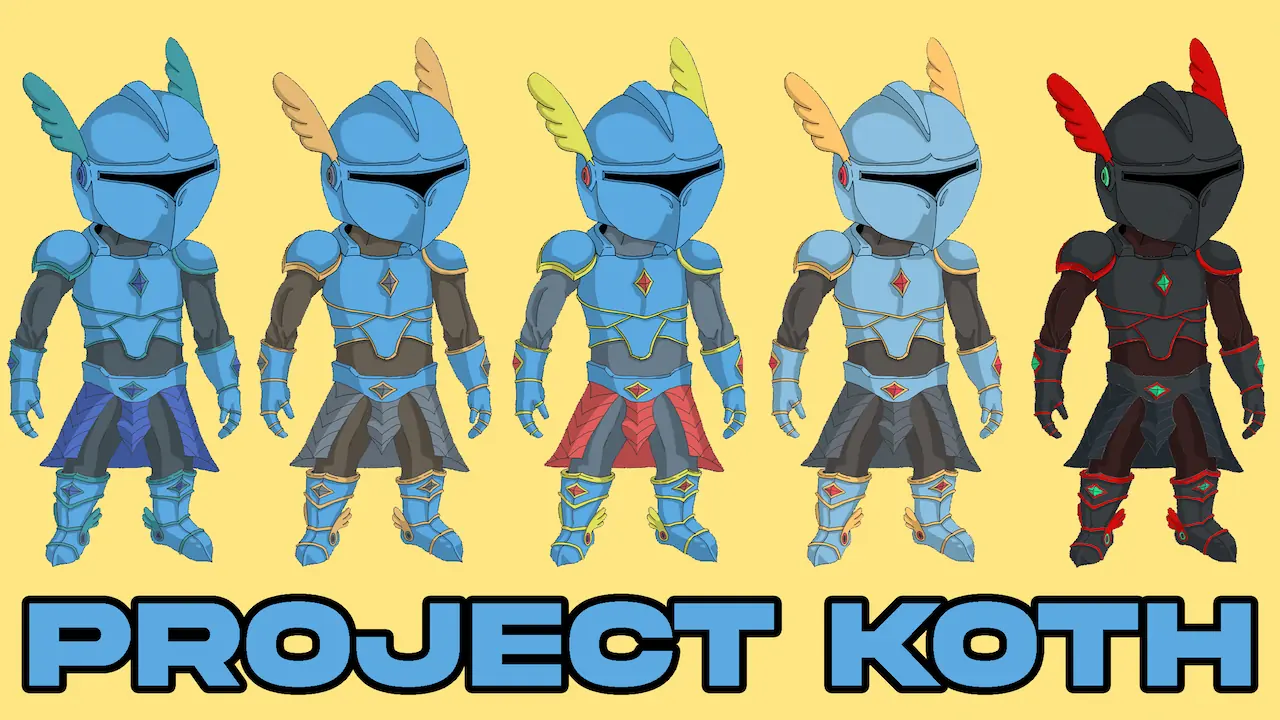
Project KOTH
A "rage game" style 3D platformer
A 3D platformer rage game designed to make you suffer. Play as Koth, an immortal knight, and master a movement system based on extreme acceleration and millimeter-perfect jumps. Get ready to die a thousand times against lethal traps and treacherous physics under the watchful (and sarcastic) eye of your telepathic dog. Ideal for speedrunners and masochists.
In development
PROGRESS12%
Devlog
09/01/2024
Chapter 1:How to Create a Video Game with AI | I Made a Game in 3 Days with ChatGPT
In this video I'll show you how I made a video game in 3 days using exclusively ChatGPT's free AI.
It all started by remembering my past times as a "developer", when I tried to create a 3D platformer and got a harsh reality check, being unable to program a simple character controller. After watching a video of someone programming a 3D game with AI, I decided to give my dream a second chance.
During these three days I managed to program a functional character controller, an options menu, and a complete dialogue system where the character interacts with the environment. I also implemented a respawn system and started tweaking the acceleration and mid-air camera mechanics.
The result has been a prototype with a "floaty" movement that gave me the perfect idea: I am going to create the Dark Souls of 3D platformers. A "rage game" designed for speedrunners, with millimeter-perfect jumps and almost unfair obstacles. The next step will be to design and model the true protagonist of the game.
09/17/2024
Chapter 2:Concept Art Guide for Video Games | How to Design Characters STEP BY STEP
In this second chapter we dive straight into designing the game's protagonist, applying Concept Art theory step by step, from the initial idea to the 3D-ready model.
The design process is divided into the following key phases:
• References: Defining the character's personality and physical traits in the GDD, relying on tools like Leonardo AI to generate preliminary visual ideas.
• Silhouettes: Drawing basic and opaque shapes to check if the character's outline is recognizable and visually striking at a glance.
• Thumbnails: Filling the winning silhouettes with interior details, combining clothes, weapons, and key elements from different references.
• Line Art: Cleaning up the drawing using pressure-defined brushes to prepare the character for the volume phase. (The phase where I finally broke in my new graphic tablet to speed up the workflow!).
• Volume and Values: Applying a grayscale defining a constant light source to add highlights, shadows (hard and soft), and three-dimensional depth.
• Color: Choosing a chromatic palette (analogous, complementary, or triadic) and applying it using blend modes like "Overlay" or "Color" while respecting the underlying volume.
The final result also includes the front and side views, indispensable blueprints so that making the leap to 3D modeling in the next chapter will be a breeze.
10/05/2024
Chapter 3:How to Create Your Own Typography for FREE | Inkscape and FontForge Guide
In this third chapter, I teach you step by step how to create your own personalized and free text font for your video game or project, using Inkscape and FontForge.
The process and the tricks I've learned through countless crashes can be summarized as follows:
• Setup in Inkscape: Create a 600x900px canvas, set mathematical guides (baseline, lowercase, uppercase), and a 25x25 grid. Vital trick! Add a square in each corner of the canvas so that FontForge automatically centers the glyph when importing it.
• Smart Design: Always save the original files (SVG), exaggerate the size of the accents, and above all, recycle shapes. If you have the "O", you already have the base for the "0" and the "8"; if you have the "b", you have the "d", "p", and "q".
• Workflow in FontForge: Configure the metrics correctly (Ascend 700, Descend 200, margins to 0) and force the encoding to Latin Windows ("ANSI"). Use the loop import shortcut to speed up the work and export the result in TTF or OTF format.
• Survival (Common errors): FontForge crashes a lot. It is mandatory to save often and make backup copies of the project manually so as not to lose days of work. It is also key to test the finished font in several programs to avoid line-spacing bugs.
As a detail for the game: the imperfections of the font give it a shaky calligraphy that fits perfectly, since the narrator will be my real-life dog. In addition, I took the opportunity to create a second alphabet of symbols and runes for the game's lore!
02/13/2025
Chapter 4:How to Model 3D Characters in Blender | This is how I MODELED my Game's Protagonist
In this fourth chapter I finally make the leap to 3D and tell you the whole odyssey of modeling the protagonist of the game in Blender.
The technical process step by step is summarized in:
• Blocking and Sculpting: Import references, create the base silhouette with subdivided spheres, merge meshes (Ctrl+J) and refine in Sculpt Mode adjusting voxels and topology.
• Armor and Low Poly: Use expanded masks and Bézier curves (for the chest) to model the armor with precision. Creation of the "Low Poly" model from the High Poly using the Decimate modifier to optimize the polygon count without losing the silhouette.
• Texturing: Application of the color palette and materials to have the High Poly model ready after almost a week of work.
As a final surprise, I haven't limited myself to creating the normal skin and a "black knight" one. I've invested extra hours in designing exclusive textures with advertising for my own channels and social networks to use in future content. In the next chapter it will be time to give it life and animate it!